Migrate from an older Exchange to Exchange 2016
The new version of Exchange Server, Exchange Server 2016 is packed with the latest technology, cloud-based developments and reliability enhancements. The whole new set of features, services and technologies provide users with the best possible experience and proficiencies for better email communication. Due to these improvements, organizations are making their way towards migrating their data from an old Exchange Server version to the new and refreshed Exchange Server 2016.
If you are also looking for a fast and reliable way to migrate your data from an older Exchange version to the latest Exchange Server 2016, then you’re probably at the right place. Although, you will have native methods to migrate your data, these will be cumbersome, error prone and time consuming. Because of these limitations native methods are giving way to third party tools like Migrator for Exchange.
In this blog you will get familiar with an easy and stress free method to migrate data from an older version of Exchange Server to Exchange Server 2016 and vice-versa.
A step-by-step guide to migrate your data from an old Exchange Server version to Exchange Server 2016 and vice-versa
Step 1: Pre-Migration Analysis
With the help of pre-migration analysis one can easily avoid various problems and errors that may arise during migration and may perhaps become a cause of migration halt.
Create Mailbox Migration Analyzer Job
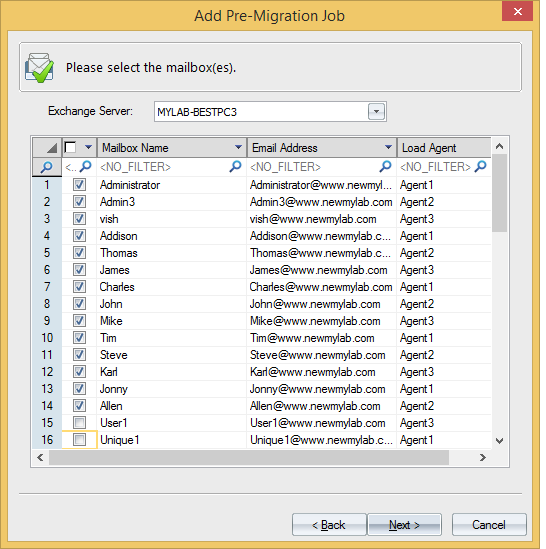
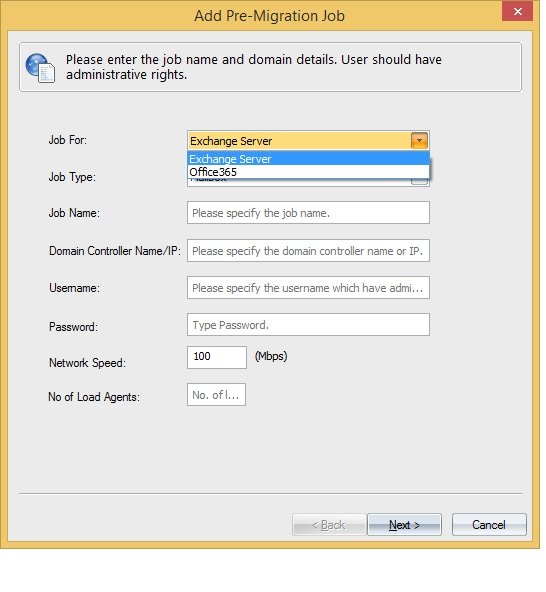
1. Start the Add Pre-Migration Job wizard from the tools. And then, enter all the desired details.
 2. The next step is to select the mailboxes that you want to migrate and then you can also map agents on them in “Load Agent” column.

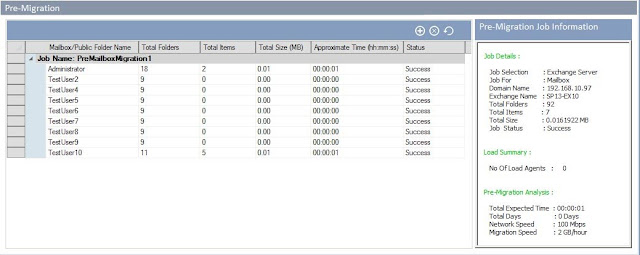
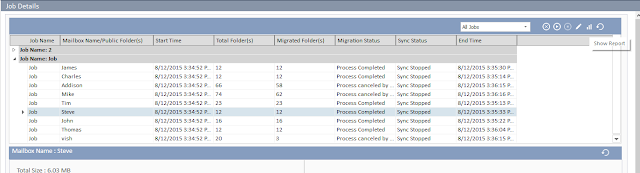
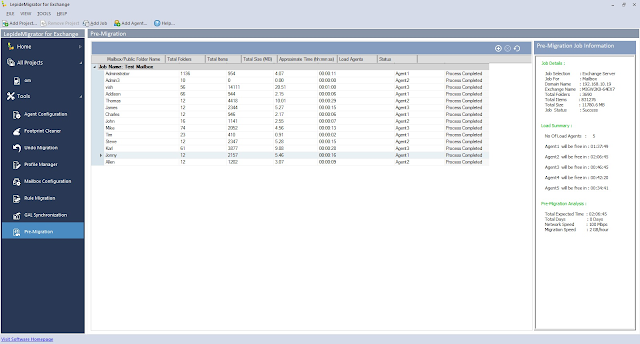
5. In the pre-migration page, you can clearly see the total count of items against each mailbox, size, and estimated migration time. This will also display details about load summary i.e. when the agents will get free.
Step 2: Configure Agents
In case of big migration projects with a huge number of mailboxes, extra system resources are needed to finish everything on time. To solve the problem of extra resources Migrator for Exchange has introduced Agent Based Configuration which can effectively use the resources of network computers.
One can also use other computers’ resources by adding those computers to resources and installing agents on them.
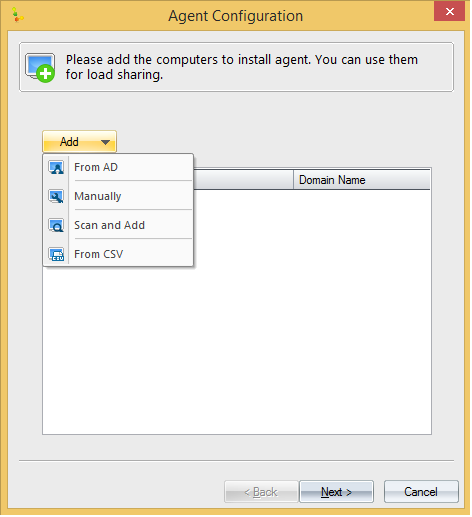
1. To configure Agents, click on Add in the Agent List page. Then, the next step is to add computers in order to install agents. Agents can be installed by four ways:
From AD: This will add a computer from Active Directory.
Add Manually: With this option, you can add computers manually.
Scan and Add: This option will allow you to scan the entire network and then add the wished-for computer manually.
Add from CSV: This method will use a CSV file to add the intended computers.
Newly added agent will appear in the Agent List Page.

Newly added agent will appear in the Agent List Page.
Step 3: Add Job for Mailboxes
Migrate all and selected mailboxes from an Exchange Server to a target Exchange Server in a different domain.
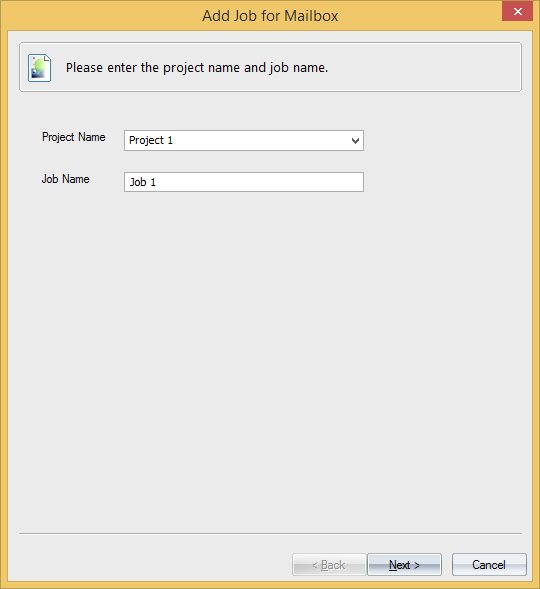
1. In the Add job for Mailbox wizard, add the project name and the job name. Then, click next.


Same Domain (Single Exchange): This option is applicable if you want to migrate to existing mailboxes in the same Exchange Server.
Same Domain (Multiple Exchange): This option is applicable if you want to migrate to a new mailbox for the same domain in a different Exchange Server.
Different Domain: Choose this option if you want to migrate to new/existing mailboxes of a different domain’s Exchange Server.
Office 365: Opt for this one if you want to migrate exchange mailboxes to Office 365.
Here we are migrating in different domains.
* Select different domain option and fill all the required credentials. Then click on next.
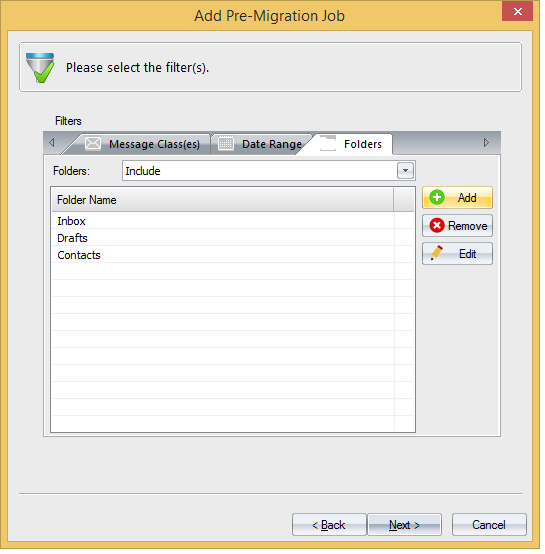
5. The next step is to apply filters to stay away from unnecessary migrations. Three filter options are there, mainly:
Message Classes: All the message classes are selected by default. Discard the message classes that you don’t want to migrate.
Date Range: You can use Include/Exclude button to add or remove messages within a particular date range.
Folders: The Include/Exclude button will include or exclude folders from migration.
Map Automatically: This will map mailboxes on the basis of their name. Mapping will only be possible if the name of mailboxes in both source and destination are matching.
Map Using CSV: This will do mapping on the basis of mapping stored in a CSV file. After doing mapping, click next.

* Skip Mailbox If Bad Item Count Exceeds: It will skip the mailbox from getting migrated if the number of bad count exceeds the given value.
* Synchronize Migrated Mailboxes: To achieve the co-existence in mailboxes, this will synchronize source and target mailboxes during and after migration.
i. Both Ways: It will synchronize both source and target mailboxes during and after migration.
ii. Source to Target: This will keep only the target mailbox in sync with source mailbox.
iii. Target to Source: This will keep only source mailbox in sync with target mailbox.
Here we will opt for both ways synchronization.
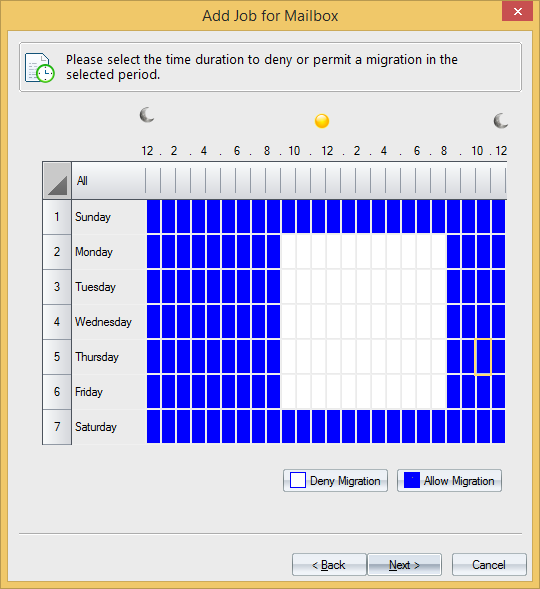
9. After clicking next, a screen will open where you can black out hours during which you want to pause migration.
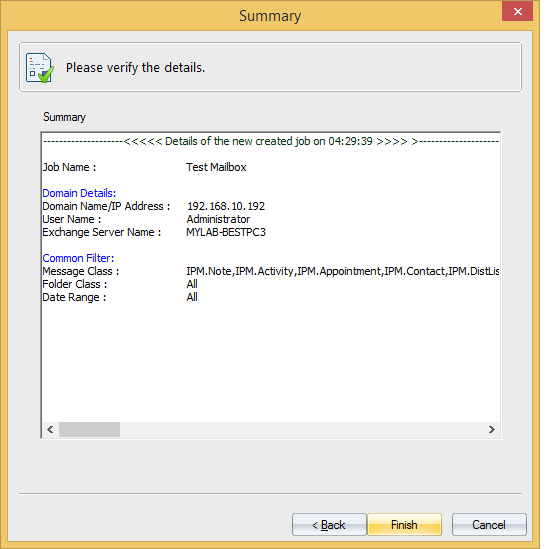
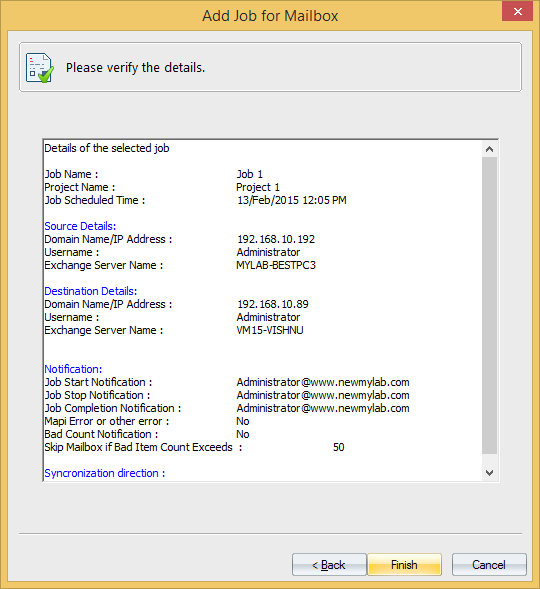
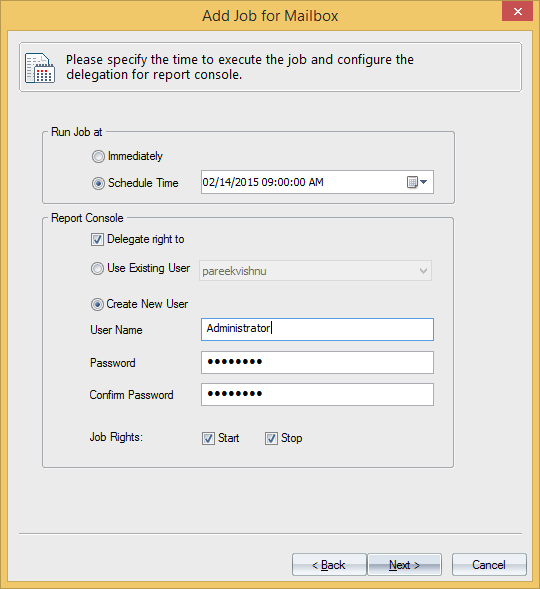
10. With the help of scheduler, you can also decide whether you want to run the job immediately or you want to run the job at some later time. After this you can review the summary of the entire process.
Migration Done Successfully
Yes, migration can be that simple!
This is the easiest and simplest way to perform Exchange migration and it will completely eliminate the need of native migration methods. Migrator for Exchange provides organizations with enhanced control over the migration process. It empowers users to solve both simple and complex migration scenarios with the utmost ease.
If you are also looking for a fast and reliable way to migrate your data from an older Exchange version to the latest Exchange Server 2016, then you’re probably at the right place. Although, you will have native methods to migrate your data, these will be cumbersome, error prone and time consuming. Because of these limitations native methods are giving way to third party tools like Migrator for Exchange.
In this blog you will get familiar with an easy and stress free method to migrate data from an older version of Exchange Server to Exchange Server 2016 and vice-versa.
A step-by-step guide to migrate your data from an old Exchange Server version to Exchange Server 2016 and vice-versa
Step 1: Pre-Migration Analysis
With the help of pre-migration analysis one can easily avoid various problems and errors that may arise during migration and may perhaps become a cause of migration halt.
Create Mailbox Migration Analyzer Job
1. Start the Add Pre-Migration Job wizard from the tools. And then, enter all the desired details.
Enter job name and domain details
Select
mailboxes and map agents
3. You can also filter the data on the basis of three parameters mainly “Message Classes”, “Date Range”, and “Folders”. After applying filter, click on the Add button.
Filter
data
4. After adding filters, you can see all the settings done in the summary wizard.5. In the pre-migration page, you can clearly see the total count of items against each mailbox, size, and estimated migration time. This will also display details about load summary i.e. when the agents will get free.
Pre-migration
analysis
Hence, Pre-migration analysis done effectively.Step 2: Configure Agents
In case of big migration projects with a huge number of mailboxes, extra system resources are needed to finish everything on time. To solve the problem of extra resources Migrator for Exchange has introduced Agent Based Configuration which can effectively use the resources of network computers.
One can also use other computers’ resources by adding those computers to resources and installing agents on them.
1. To configure Agents, click on Add in the Agent List page. Then, the next step is to add computers in order to install agents. Agents can be installed by four ways:
From AD: This will add a computer from Active Directory.
Add Manually: With this option, you can add computers manually.
Scan and Add: This option will allow you to scan the entire network and then add the wished-for computer manually.
Add from CSV: This method will use a CSV file to add the intended computers.
Newly added agent will appear in the Agent List Page.
Add
computers to software
Newly added agent will appear in the Agent List Page.
Step 3: Add Job for Mailboxes
Migrate all and selected mailboxes from an Exchange Server to a target Exchange Server in a different domain.
1. In the Add job for Mailbox wizard, add the project name and the job name. Then, click next.
Enter
project name and job name
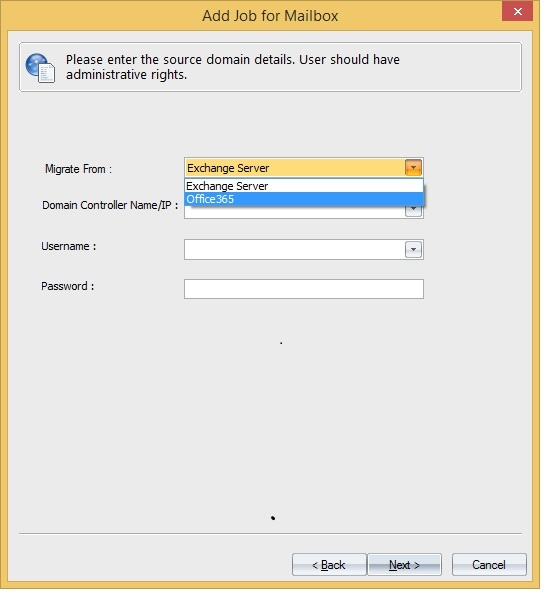
2. The next step is to enter the source domain details. Select the Exchange Server option from the drop down. And then enter all the required fields.
Enter
source domain details
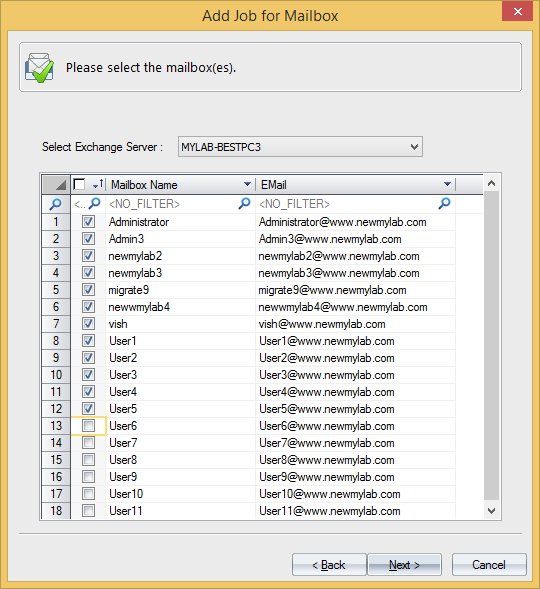
3. After this, the software will be connected to the source domain. This will enlist all mailboxes of the Exchange Server. Then, all you have to do is select the mailboxes that you want to migrate.
Select
mailboxes
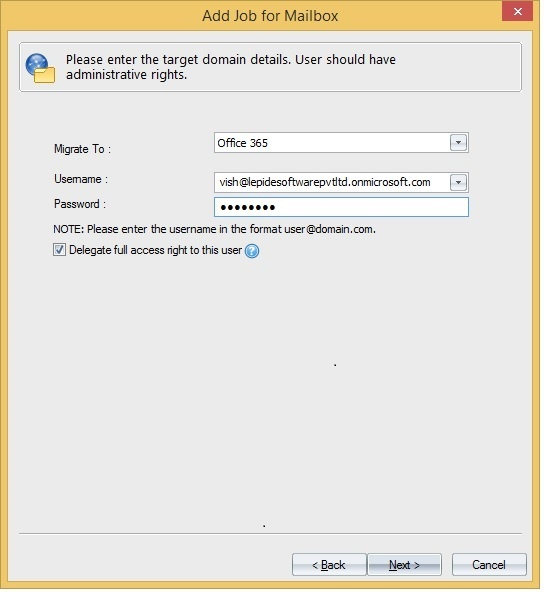
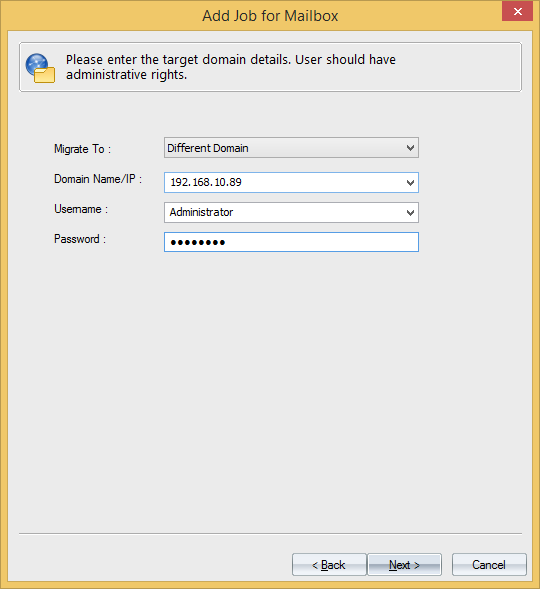
4. Enter the target domain details. To do this, four migration options are there:Same Domain (Single Exchange): This option is applicable if you want to migrate to existing mailboxes in the same Exchange Server.
Same Domain (Multiple Exchange): This option is applicable if you want to migrate to a new mailbox for the same domain in a different Exchange Server.
Different Domain: Choose this option if you want to migrate to new/existing mailboxes of a different domain’s Exchange Server.
Office 365: Opt for this one if you want to migrate exchange mailboxes to Office 365.
Here we are migrating in different domains.
* Select different domain option and fill all the required credentials. Then click on next.
Target domain details
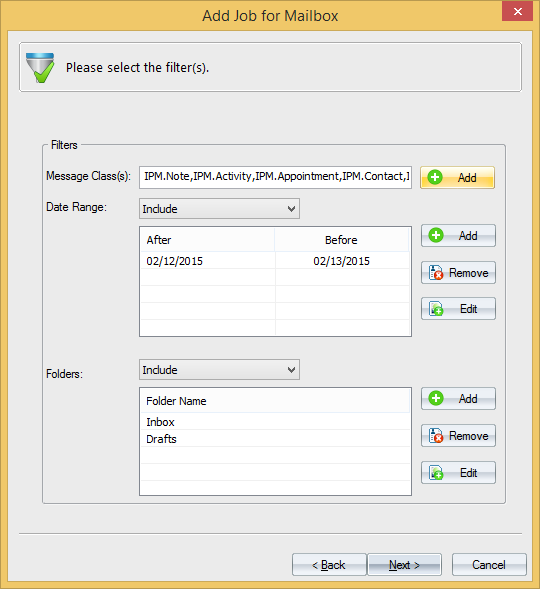
* It will display all the mailboxes within target Exchange Server. Select all the mailboxes which you want to migrate.5. The next step is to apply filters to stay away from unnecessary migrations. Three filter options are there, mainly:
Message Classes: All the message classes are selected by default. Discard the message classes that you don’t want to migrate.
Date Range: You can use Include/Exclude button to add or remove messages within a particular date range.
Folders: The Include/Exclude button will include or exclude folders from migration.
Apply
filters on mailbox migration
6. After setting filters, map source and target mailboxes. There are two ways to do this:Map Automatically: This will map mailboxes on the basis of their name. Mapping will only be possible if the name of mailboxes in both source and destination are matching.
Map Using CSV: This will do mapping on the basis of mapping stored in a CSV file. After doing mapping, click next.
Mapping
of source and target mailboxes
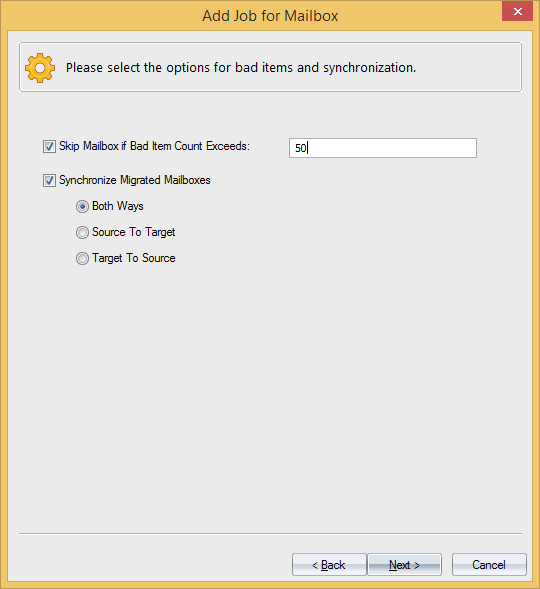
7. Next step is to select the option for bad items and synchronization.* Skip Mailbox If Bad Item Count Exceeds: It will skip the mailbox from getting migrated if the number of bad count exceeds the given value.
* Synchronize Migrated Mailboxes: To achieve the co-existence in mailboxes, this will synchronize source and target mailboxes during and after migration.
i. Both Ways: It will synchronize both source and target mailboxes during and after migration.
ii. Source to Target: This will keep only the target mailbox in sync with source mailbox.
iii. Target to Source: This will keep only source mailbox in sync with target mailbox.
Here we will opt for both ways synchronization.
Bad
item count and synchronization setting
8. Then select the events on which you want to send notifications along with the email address of the recipient.9. After clicking next, a screen will open where you can black out hours during which you want to pause migration.
Specifying
migration window
10. With the help of scheduler, you can also decide whether you want to run the job immediately or you want to run the job at some later time. After this you can review the summary of the entire process.
Migration Done Successfully
Yes, migration can be that simple!
This is the easiest and simplest way to perform Exchange migration and it will completely eliminate the need of native migration methods. Migrator for Exchange provides organizations with enhanced control over the migration process. It empowers users to solve both simple and complex migration scenarios with the utmost ease.